Tuesday, April 17, 2012

Pizza night

Last night for dinner we had BLT's and fruit salad.  Now, I'm not going to share my BLT recipe with you because it's really simple.  Toast.  Bacon.  Lettuce.  Tomato.  Go crazy and skip the mayo and smear on some smashed avocado.  Easiest dinner ever.

When I was fryin' up the bacon, my middle mini came running up the stairs and said, "Mom, it smells like bacon in here.  Are you making bacon?  You are?  You are really making bacon?  Guys, guess what?!?  She is really making bacon.  We have the best mom ever."  Expect to see more bacon recipes from me in the near future.

Clearly, my minis love bacon.  In fact, they love it so much that Mr. McGhee convinced them to act like dogs and do tricks for bacon rewards.


They even wear shirts proclaiming their love for bacon.


Since the BLTs were such a hit, I decided to try another kid-friendly dinner for tonight, pizza.  However, we gave up processed food and I do not know how to make a pizza crust, so I found myself sort of in a bind.  And then I remembered seeing a recipe for cauliflower crust pizza that I found intriguing.  I was super excited when I read the recipe and realized that it called for ricing cauliflower because Mr. McGhee just got me this for my birthday.....


This food processor is totally bitchin'.  I have been wanting a food processor for years and this baby was worth.the.wait.  So, I was more than happy to fire her up today to rice me some cauliflower.

Cauliflower Crust Pizza

  • 1 cup cooked, riced cauliflower  (4 pulses in my processor, but who's bragging?)
  • 1 cup shredded mozzarella cheese (10 seconds and I had a brick of mozzarella shredded into 3 cups)
  • 1 egg, beaten
  • 1 tsp dried oregano
  • 1/2 tsp crushed garlic
  • 1/2 tsp garlic salt
  • olive oil (optional)
  • pizza sauce, shredded cheese and your choice of toppings*

To rice the cauliflower:
1.  Take 1 large head of fresh cauliflower, remove stems and leaves, and chop the florets into chunks. 
2.  Add to food processor and pulse until it looks like grain. Do not over-do pulse or you will puree it. (If you don't have a food processor, you can grate the whole head with a cheese grater.  Then, send your hubby a link to my blog and tell him that Mr. McGhee already did all the research, all he has to do is buy the processor). 


Cooking Directions
1.  Place the riced cauliflower into a microwave safe bowl and microwave for 8 minutes (some microwaves are more powerful than others, so you may need to reduce this cooking time). There is no need to add water, as the natural moisture in the cauliflower is enough to cook itself.


To Make the Pizza Crust:
1.  Preheat oven to 450 degrees. Spray a cookie sheet with non-stick cooking spray.2.  In a medium bowl, stir together 1 cup cauliflower (you will have lots of leftovers), egg and mozzarella.
3.  Add oregano, crushed garlic and garlic salt, stir.
4.  Transfer to the cookie sheet, and using your hands, pat out into a 9" round. Optional: Brush olive oil over top of mixture to help with browning.
5.  Bake at 450 degrees for 15 minutes.
Remove from oven. To the crust, add sauce, toppings and cheese. Place under a broiler at high heat just until cheese is melted (approximately 3-4 minutes).

*Note that toppings need to be precooked since you are only broiling for a few minutes.*


To answer your question, yes, that crust tastes as good as it looks.  I snuck a taste, I couldn't help it!  Tonight, we will top it with pizza sauce, cheese, and green olive on the mini's pizza and pizza sauce, fresh mozzarella, basil, and veggies on the adult's pizza.  I plan on serving it with side salad.

Here is the pizza sauce recipe I made.  This is a VERY basic pizza sauce, but I thought it would be perfect with the cauliflower crust.

Pizza sauce

  • 3 cloves minced garlic
  • 3 tbsp olive oil
  • 1 (29 oz) can tomato puree
  • 1 (28 oz) can crushed tomato
  • 2 tbsp brown sugar
  • 1 tbsp italian seasoning
  • 1 teaspoon dried basil
  • 1/2 tsp salt
  • 1/2 tsp crushed red pepper flakes


  1. In a large saucepan, saute garlic in oil until tender. 
  2. Stir in the remaining ingredients. 
  3. Bring to a boil. 
  4. Reduce heat; simmer, uncovered, for 30 minutes or until sauce reaches desired thickness. 


I am hoping that there isn't massive disappointment at the dinner table tonight when the minis realize there is not any bacon being served.   


COMING BACK HERE TO EDIT:  Oh My.  Delish.  This pizza crust was amazing.  The minis LOVED it. They had no clue that it was made of caulflower.  My oldest mini commented that it tasted different than some pizza crusts, and he thought it was from the italian spice.  My tiny mini ate FOUR pieces.  A total victory!


Monday, April 16, 2012

Ch-ch-ch-chia

A couple of years ago, Mr. McGhee and I had a date night.  In our house, date night means we put the minis to bed early, pop some popcorn, rent a movie, and try to stay awake past the opening credits.  The movie we picked that night was the documentary called Food Matters.  The film is full of solid information (that has been supported by scientific research) about alternative diets, medicine, and lifestyles.  We were amazed by the astounding scientific information ranging from the advantages of raw diets and yoga to treating cancer holistically.

I watched the film and all I can remember is that people actually eat chia seeds.
My apologies to the film makers, because I do think your documentary was a wealth of information and I did love it.  But, seriously, I could not get over the fact that people actually eat chia seeds.  So, imagine my surprise when I was doing research the other day for easy breakfast options and came across a recipe that called for chia seeds.  Then, my inner nerd started doing some reading and discovered that chia seeds are, indeed, very healthy for you.  Like, way freaking healthy for you.  Here's some of the information I found about chia seeds.....

  • 2 times the protein of any other seed or grain,
  • 5 times the calcium of milk, plus boron which is a trace mineral that helps transfer calcium into your bones
  • 2 times the amount of potassium as bananas,
  • 3 times the reported antioxidant strength of blueberries
  • 3 times more iron than spinach
  • copious amounts of omega 3 and omega 6, which are essential fatty acids...

    Chia seeds are a complete source of protein, providing all the essential amino acids in an easily digestible form. They are also a fabulous source of soluble fiber.  Like flax, chia is highly 'hydrophilic' - the seeds absorb water and create a mucilaginous gel. They can hold 9-12 times their weight in water and they absorb it very rapidly - in under 10 minutes.  This fills you up faster (hey...anyone trying to lose weight?!??!  Toss in some chia seeds!)  
     Chia seeds also have antioxidants!!!


  • Want to know more?  You should!!!  I know I sure do!  Start reading here and here.  Heard enough and want to try eating some chia?  I've got a super easy and convenient way for you to try, overnight refrigerator oatmeal.

    Ingredients
    • 1/4 cup uncooked old fashioned oats
    • 1/3 cup skim milk
    • 1/4 cup low-fat Greek yogurt (I used non-fat)
    • 1-1/2 teaspoons dried chia seeds

    1.  Put all the ingredients in a jar.
    2.  Add toppings to your preference.
    **Suggested toppings:  fruit, honey, vanilla extract, applesauce, peanut butter, cocoa powder, maple syrup.
    3.  Put in the refrigerator overnight.
    4.  Shake.
    5.  Serve.
    I went with a little vanilla extract and frozen raspberries.  Next time I will do strawberries, this was a little tart for the minis.


    These are a great way to start your day.  If you have a few extra minutes, I would suggest drinking an OJ smoothie as well.  

    OJ smoothie
    • 4-6 oranges, peeled (I used minelleo and clementine)
    • 2 cups ice
    • 1 cup milk
    • 2 tbsp agave or honey
    • 2 tbsp vanilla extract 
    1.  Put all ingredients in blender and blend.  


    Start your day out right.  Start your day out with some chia seeds.  


    And, if you have any leftover, rub them on this guy.  


    Saturday, April 14, 2012

    Trying to Inspire You All!!!!

    Last night the McGhee family went to see our local minor league hockey team play.  Mr. McGhee and the boy minis love going to these games.  Myself and my tiny mini are notsomuch the fans, but occasionally we like to tag along.  On the way to the game last night, my oldest mini (the one that donates stuffed animals to hospitalized kids and writes me poems every night) says to me, "Mom, tonight I am hoping for either a bench brawl or a goalie fight.  Because that would be something special."


    My mini got what he wished for.  Something special.  And as the crowd was throwing aside their hotdogs, nachos, and beers to struggle up out of their seats and scream, "fight, kill, fight" I realized hockey is a very primitive sport.

    And then I went home and I set my alarm to get up early so I could participate in this event to raise awareness for organ donation.  And at the finish line, there were people dropping their bananas, oranges, and water bottles to jump up and cheer for runners as they crossed the finish line.  I realized that running is a very encouraging and inspirational sport.

    Someone after the race said to me, that today is a reminder to cherish every day because you never know in life what will happen.  And I agree with that, whole-heartedly.  But, after today's race, I walked away with a different message.  I have got to take care of what I have in order to honor all these people that are so sick and would do anything to be living life in a healthy body.  And I have to keep working hard to inspire other people to do take care of themselves.  It's the least we can do, right?  Take care of yourself....do it for YOURSELF and for pete's sake, do it for all the people that love you!

    I'm bringing back one of the first recipes I posted here, mainly b/c it is an absolute favorite in our house!  We are very busy today, Mr. McGhee and our oldest mini are working on making my raised garden beds and I am busy spring cleaning inside.  Since I am cleaning, that means our minis are stuck outside for the day and I am just randomly bringing them bowls of food to keep them satisfied.  So far, they have seemed the most excited about kale chips.

    Kale Chips

    • 1 bunch of kale
    • olive oil
    • seasoned salt (or sea salt)
    1. Preheat an oven to 350 degrees F
    2. Line a cookie sheet with foil.
    3. Using a knife or kitchen shears carefully remove the leaves from the thick stems and tear into bite size pieces. Wash and thoroughly dry kale with a salad spinner.   (or buy the bag of pre-cut kale....who says all convience food is processed?)
    4. Drizzle kale with olive oil and sprinkle with seasoning salt.
    5. Bake until the edges brown but are not burnt, 10 to 15 minutes.               


    And because I am obsessed I made another batch of sweet potato, kale, and cranberry quinoa.  We have been randomly snacking on that throughout the day.  I made a late breakfast of spinach, goat cheese, and peppadew omelets with toast.  So, I have done lots of cooking today...but sorry, no new recipes!  Tonight, Mr. McGhee and the boy minis are heading back to another hockey game.  I have a girls night out with my favorite girl in the world and plans to set my alarm for a run early tomorrow morning.


    Thursday, April 12, 2012

    Dreams and Avocados

    In the McGhee home, we like to dream big.

    For instance, my middle mini wants to grow up and live in an RV on the beach and be a stay at home dad so he can play with his kids on the beach all day while his wife works.


    My oldest mini wants to work at a smoothie shop and make "power smoothies".


    And my tiny mini dreams of never having her hair cut.


    I dream of baking bread, growing my own pear tomatoes, and raising chickens.  Thank goodness for Mr. McGhee and his grown up dreams or we'd all be in trouble!

    Another thing I dream about is avocados.


    I think avocados are the perfect food.  If I am ever stranded on an island....say in an RV with my middle and oldest mini because we don't have enough money to pay our phone bill and call for help.....I would want to have a source of avocados near by.  They have fat.  They have calories.  And they pack 20 nutrients.  And they are darn tasty.  Just as a sidenote, they are they perfect first food for a baby too, just smash and serve.

    So, tonight's dinner is avocado chicken quesadilias.


    Ingredients  


    • 1 tablespoon butter
    • 8 flour tortillas, fajita size
    • 1 cup Colby-Jack cheese
    • 1 cup Pepper-Jack cheese, shredded
    • 2 cups cooked chicken, shredded (I used chicken from yesterday)
    • 1 avocado, diced sprinkled with 1 teaspoon garlic salt
    • 2 green onions, diced

    Instructions (Just as a sidenote here, I have wasted a solid hour of my life trying to get this off of an aqua and large font and I can't get it to work.  So, I apologize if this is bothering you.  Please know it is bothering me too.)

    1.  Heat a griddle or cast iron skillet over medium-high heat until hot. Add a little butter to the griddle and melt. 

    2.  Place one tortilla over melted butter, sprinkle with 1/4 cup Colby-Jack and 1/4 cup Pepper-Jack cheeses, 1/2 cup of chicken, 1/4 of the green onions, and 1/4 of the avocado; top with another tortilla. 


    3.  Cook until browned, using a spatula gently flip over and cook until bottom tortilla is browned. Remove to a cutting board and slice with a sharp knife or pizza cutter into 4 wedges. Repeat with remaining ingredients.


    These quesadilias were absolutely delish!  If you have never tried homemade tortillas, I highly recommend trying them with this recipe, it is well worth the extra time and effort.  


    Roll the tortillas out as thin as you can.  


    Try to cut them in equal sizes.  For Pete's sake, do a better job of this step than I do!!!


    Heat up on a skillet....no spray, oil, grease needed....just a minute or so on each side until browned.


    So, here's my quesadilia.  It's a trainwreck, but an oh-so-delish trainwreck.


    I served my delish quesadilias with these babies....


    You can see on the ingredient label, that these tortilla chips only have 4 ingredients so technically they are not processed food.   In my heart, I know these are a cheat.  I also have a certain Mr. McGhee that is in my heart too.  And Mr. McGhee loves him some tortilla chips and homemade salsa.   And since his dreams keep our family afloat, I strive to keep him happy.  Just ask him.  


    So there you go, a totally delish dinner!  Eat your avocados!  And, for crying out loud readers, ChAsE yOuR dReAmS.  (Even if that dream is to live in an van down by the river RV on the beach).

    Wednesday, April 11, 2012

    Menu Planning

    The question I get asked the most is "how do you do it all?"  In the interest of full disclosure, I do not work full time out of the house.  However, I do work very part-time running a non-profit, run a very small supplemental consultation business, and have 3 minis that keep me busy with swimming, baseball, yoga, soccer, strength training, and therapy appointments.  And, I spend some serious time researching, cooking, and writing for this blog.  So, yes, the McGhee household is very busy and Monday-Thursday we come home from activities after 6 pm.  And that makes dinner tough.  However, I am very committed to feeding my family a healthy, balanced dinner every night.  In order to do this, I can't wait until 5 pm to think about dinner.

    The theme of the day is planning ahead.  This is an  organizing blog that I started following a while back that has fabulous ideas on how to menu/meal plan.  I will say, while I love reading Jen's suggestions, I have never actually done any of Jen's suggestions.  I recently saw this on pinterest and think it could be a great tool.  You store your tried and trusted recipes in the pockets and each week, select seven recipes to make that week.


    This is a simpler concept, mainly to be used to record what your menu plans are for the week.


    I use a very simple method of menu planning.  I have a day planner that I use to keep track of all of our schedules.  I have a running list of recipes I want to try.  There is no organization to my list, if I see a recipe, I write it down.  Once a week, I go through my list and write down a menu item on the calendar for each day.

    Sounds easy, right?  Except every day, I am gone from 3-6pm, so making those dinners for 3 hungry minis gets tricky.  I try to always have a soup or stew made each week because that is an easy dinner.  I make a huge batch and we can usually get 2 nights out of it.  One night I will pair it with grilled cheese and fruit salad, another night I will pair it with a spinach salad.  I also love breakfast for an easy dinner night.  And on a real rough night, I resort to PB&J, fruit salad, and a spinach smoothie.

    With all that being said, the recipes I am sharing with you today are NOT for nights when you come home at 6pm and need to make dinner.  But on those Sundays, when you are home catching up on laundry, paying bills, and shooing the minis out of the room so you can watch your DVRed shows.....these are the recipes to try.  Make two of the chickens, you can use the leftovers all week long for dinner.  Make double of the vegetables, you can pack them in lunches all week long.  If you live with someone that doesn't eat leftovers, tell them they are making life much more difficult than it needs to be.  

    Roasted chicken (For the first night, you can follow this recipe and for a later night make the vegetable dish below).

  • 1 3-5lb. roasting chicken
  • 6 garlic cloves, peeled and squashed
  • 1/2 lemon
  • 1/4 cup or so of grapeseed (I use roasted garlic grapeseed oil)
  • kosher or sea salt
  • freshly ground pepper

  • 1. Two hours before you begin, take the chicken out of the refrigerator to bring it up to room temperature. Tip: Always start cooking meat from room temperature as it ensures even cooking throughout.  **This is how the recipe is written, I never remember to do this**
    2. Dry chicken inside and out with paper towels (alternately you can leave it in the fridge uncovered for a day as well and really dry it out) and season the cavity with coarse salt and pepper.
    3. Put 4 cloves of the squashed garlic and 1/2 a lemon into the cavity. Set the bird on a platter breast side up and rub with oil then sprinkle with salt and pepper. Flip the bird over and repeat on the back and legs.
    4. Preheat your oven for 425°F. 
    5. Place chicken in center of roasting dish, back side up. That’s right, back side up (as in breast side down).  Roast in 425°F oven for 25-35 minutes (more towards the 35 minute mark if the bird is closer to 5 pounds), then turn the oven down to 375°F and roast for an additional 60-120 minutes (depending on the size of your bird).  Chicken is done when internal temperature (measured at the thickest part of the thigh) reaches 165°F.
    7. Remove the chicken from the roasting pan and set on a wooden board to rest for 20 minutes. 


    This is just to show you how you want to put the chicken in the pan....breast side DOWN.


    Quinoa salad with Roasted Sweet Potatoes and Kale


    I feel the need to tell you all, this *may* be the single-most amazing veggie dish I have ever made.  AMAZING!!!!

    • 2 large sweet potatoes, peeled and chopped
    • 1/2 medium red onion, sliced
    • 1 tablespoon olive oil
    • Salt and pepper, to taste
    • 3 cups kale
    • 5 tablespoons balsamic vinegar, divided
    • 1 cup uncooked black quinoa
    • 2 cups water
    • Pinch of salt
    • 1/2 cup dried cranberries
    • crumbled goat cheese (optional)
    1.  Preheat oven to 400F.  Place sweet potatoes and red onion slices in a medium bowl, drizzle with olive oil, and season with salt and pepper.  Toss together and put them on a large baking sheet.  Bake in the oven for 30-45 minutes, until sweet potatoes are tender.  Stir a few times while baking.
    2.  Drizzle kale with 2 tbsp of balsamic vinegar.  Season with salt and pepper and place on a baking sheet.  When sweet potatoes and onions have been in oven for 15 minutes, put the kale in the oven.  Bake for 15 minutes or until kale is wilted and starting to crisp.
    3.  Prepare the quinoa, following instructions on package.  
    4.  When the vegetables are done roasting, let them cool to room temperature.  In a large bowl, combine quinoa, sweet potatoes, red onion, and kale.  Drizzle the salad with the remaining three tbsp of balsamic vinegar.  Add in the dried cranberries.  Go crazy and toss in some crumbled goat cheese.  And don't be chinzy with the cheese, load it up!  Season with salt and pepper.


    I can't describe how delish this is!  I will tell you that I made a double batch at lunch time and I am concerned there may not be enough leftovers for Mr. McGhee and the minis at dinnertime!  


    This is a delicious Sunday night dinner and a great way to start your week.  Make sure you make extra chicken because tomorrow I have a recipe to share, using the chicken!  

    Tuesday, April 10, 2012

    Total Smartie

    I am in a bookclub.  That means I can read.  And, that means, I can talk.  That also means that I am very smart.  See, the women in my bookclub are very smart.  And smart people like to associate with other smart people.  So, by default, I'm smart too.

    Last night we had bookclub meeting at my house.  Since it was at my house, I got to chose the book we were to have read.  The book was The Immortal Life of Henrietta Lacks.  This book is about the decades of scientific research done on the HeLa line of cells, which were taken unknowingly from a poor tobacco farmer.

    I told you we were smart.  There are no cheesy romance novels on our book list.

    Since I got to host bookclub last night, I got to prepare snacks and dessert.  Because my greek hummus dip was such a hit on Easter, I made it again.  It went over really well with the smart bookclubbers.


    7-Layer Greek Dip
    • 1 8-oz. package cream cheese, softened (I used low-fat)
    • 1 tsp. dill weed or Greek seasoning (salt free–go for a mix that just has herbs)
    • 3 cloves garlic, minced or pressed
    • 2 tsp. lemon juice
    • 1 1/2 c. hummus
    • 1 c. seeded, diced cucumbers
    • 1 c. seeded, diced tomatoes
    • 1/2 c. chopped Kalamata olives
    • 1/3 c. chopped green onions (about 3 green onions completely chopped)
    • 1/2 c. crumbled Feta cheese
    • 1/8-1/4 c. minced fresh parsley

    1.  With an electric mixer, combine the cream cheese, seasoning, garlic, and lemon juice until light and fluffy. 
    2.  Spread in the bottom of a pie plate or a small, shallow baking dish. 
    3.  Then spread a layer of hummus. 
    4.  In order, create layers by sprinkling the cucumbers, tomatoes, olives, onions, Feta cheese, and parsley. 
    5.  Cover with plastic wrap and chill for at least 2 hours. Serve with pita chips, fresh vegetables, and/or flatbread.  

    I also made a sundried tomato basil and brie spread.  This was very easy to make.  I am not a fan of brie at all, so I did not love this spread.  However, the bowl was empty, so I think the smart bookclubbers must have a much more sophisticated palate than I do because they seemed to enjoy it.
    Sun Dried Tomato, Basil, & Brie Spread
    • 5 ounces brie cheese, room temperature 
    • 1/4 cup sun dried tomatoes, finely chopped 
    • 1 sprig (4-5 large leaves) fresh basil 
    • Coarse sea salt & freshly ground pepper, to taste

    1.  Remove as much of the rind from the brie as possible.  (Easier said than done!)
    2.  In a small mixing bowl, stir together brie, sun dried tomatoes, basil, and salt and pepper. Transfer to a serving dish. To store, chill in an airtight container.
    3.  Serve at room temperature with crackers.


    The final dish I made was a citrus salad with mint.  This was so delicious, I had three servings, which everybody knows is very rude to do at your own party.  I couldn't stop myself, this was amazing!
    Mixed Citrus Salad with Feta, Onion and Mint
    • 3 to 4 tablespoons red onion, cut into tiny bits
    • 4 pieces of citrus, preferably a mix of grapefruits and oranges (I used minneola orange, clementine orange, and grapefruit.  In a perfect world, I would have found blood oranges and used those too.)
    • 1 tablespoon red wine vinegar 
    • 1 teaspoon smooth Dijon mustard
    • 1 tablespoon olive oil
    • alt and freshly ground pepper, to taste
    • 3 to 4 tablespoons (1.5 ounces) feta cheese, chopped or crumbled
    • 1 tablespoon fresh mint, chopped or cut into tiny slivers

    1.  Place your red onion in the bottom of a medium bowl. Nest a strainer over the bowl.

    2.  Prepare your citrus fruits by beveling the stem end of one, cutting enough off that you reveal the pith-free flesh of the fruit. Repeat on the other end. Rest your fruit on one of its now-flat surface and begin cutting the peel and pith off in large, vertical pieces. You want the fruit’s exterior to be “white”-free.  (Don't have a clue what that means?  Yeah, me neither!  Basically, use a knife to cut all the peel off of the fruits.)

    3.  Turn the fruit back on its side and cut it into 1/4-inch thick wheels, removing any seeds and thick white stem as you do. 

    4.  Place the wheels and any collected juices from the cutting board in the strainer over the bowl with onion. Repeat with remaining citrus fruits. (As the extra juices drip over the bowl, it will soften the raw onion bite.)  

    5.  Spread the fruit slices out on a platter. Scoop out the onion bits (a slotted spoon or fork does the trick) and sprinkle them over, leaving the juice in the bowl. 

    6.  Whisk one tablespoon of juice (this is all I had accumulated) with red wine vinegar, Dijon and olive oil. Season with salt and freshly cracked black pepper. Drizzle the dressing over the citrus, sprinkle with feta and mint, adjust salt and pepper to taste.  Serve immediately.

    SIDENOTE:  I cut my fruit up ahead of time and stored them fruit slices in a bowl in the fridge.  So, when I made my dressing I had several tbsp of fruit juice.  I put the fruit slices, onion, mint, and cheese on a platter on the table.  Right before we ate, I drizzled the dressing over the salad.


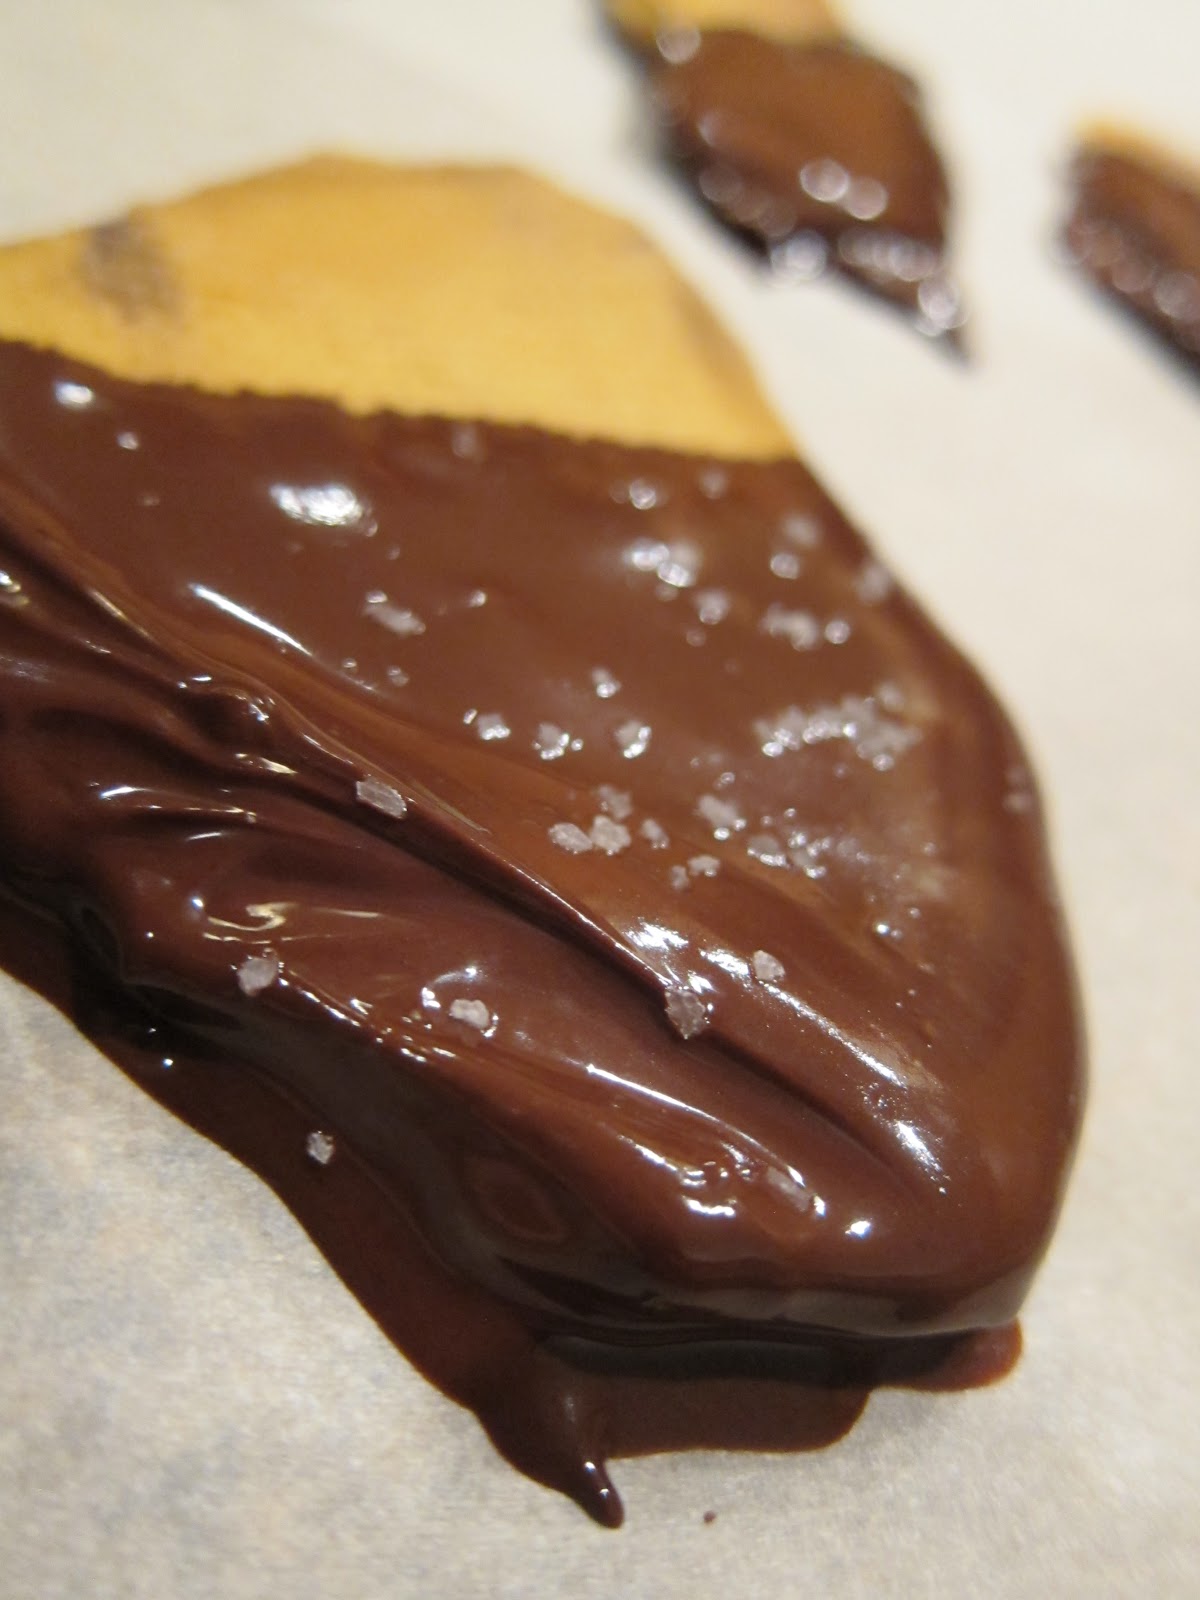
    Dessert last night was a huge hit and perhaps the easiest dessert ever.....chocolate mangoes.  I came up with this idea after a long day at gardening class a few weeks ago.  

    Chocolate Mangoes
    • dried mangoes (HIGHLY recommend finding real fresh dried mangos)
    • dark chocolate
    • kosher (or sea) salt
    1.  Melt dark chocolate in double broiler (or microwave).
    2.  Dip mango in melted chocolate.
    3.  Lay on sheet of parchment paper.
    4.  Let sit for 10 minutes and then sprinkle with salt.


    It was a great night!  Looking forward to our next meeting!


    ONE QUICK ANNOUNCEMENT:  I have gotten lots of emails that people can't comment on the blog.  I have changed the security settings and everyone should be able to comment now.  Let me know if it doesn't work!