Wednesday, November 28, 2012

Chicken Night!

On November 1st, my tiny mini was having calendar time at preschool.  Her teacher asked the class, "It's November, does anyone know what holiday is in November?"  To which my tiny mini shouted, "Chicken Night!"

Or Turkey Day.  Close enough.

In the past, I have made a complete Thanksgiving dinner following the Pioneer Woman's recipes.  Her turkey, mashed potatoes, and stuffing recipes are to.die.for.  Seriously, if I were dying and could request you to make me one last meal, that would be it.  Of course, if you didn't have an entire day to cook that one last meal for me, I would settle for Cheez-Its, twizzlers, and a McDonald's Diet Coke.

This year my mom invited the McGhee family over for Thanksgiving.  And, while I would love to share all of her recipes with you, I can't.  Because my mom is one of those cooks that doesn't follow recipes, rather she just adds a little of "this" and a little of "that" along with a few sticks of butter and it tastes amazing.  

So the only Thanksgiving recipe I have to share with you today is a vegetable dish I have been making for years at Thanksgiving.  I only make this dish once a year, because it's one of those dishes that is really dessert disguised as a vegetable.  

Now, I saw that the week before Thanksgiving there was a "best-squash-ever" recipe floating around on pinterest.  Well, this is what I have to say about that.  I am over pinterest's "best _____ ever" recipes.  I have now tried at least 10 of them and have sadly discovered that they are all average, at best.  So, don't trust what you see on pinterest.  But, you can trust Heids McGhee.  If you're looking for a side dish that resembles a vegetable, but tastes like a dessert, here you go....

Squash casserole (I apologize to the source of this recipe. I have this saved on my computer from 7 years ago and can't track down where I got the recipe....I publicly admit that this deliciousness is not my own work).
  • 1 butternut squash
  • 1 cup white sugar
  • 1 1/2 cups milk
  • 1 teaspoon vanilla extract
  • 1 pinch salt
  • 2 tablespoons all-purpose flour
  • 3 eggs
  • 1/4 cup butter, melted         
Topping
  • 1/2 (16 ounce) package vanilla wafers, crushed
  • 1/2 cup butter, melted
  • 1 cup brown sugar
1.  Preheat oven to 425 degrees F (220 degrees C).
2.  Put butternut squash in the microwave and cook on high, until soft, 2 to 3 minutes. Cut in half, scoop out seeds and cube. Bring a large pot of water to a boil. Add squash and cook until tender, about 15 minutes. Drain and mash.
3.  In a 9x13 inch casserole dish combine 3 cups mashed butternut squash, white sugar, milk, vanilla extract, salt, flour, eggs and 1/4 cup melted margarine.
4.  Bake in preheated oven for 45 minutes, or until set.
5.  In a medium bowl combine crushed vanilla wafers, 1/2 cup melted margarine and brown sugar. Crumble over top of cooked casserole and return to oven to brown.

I feel at this point, there are a few things I need to address.  #1.  Yes, that is processed Nilla Wafers.  #2.  Yes, that is a heck of a lot of butter.  #3.  Yes, that is a heck of a lot of sugar.

In my defense, I warned you...this is more dessert than veggie.  And guess what?  Eating veggies that taste like dessert make people happy.  And isn't that what Thanksgiving is all about?  Isn't that how those suffering pilgrims were hoping we would celebrate their pilgrimage?

Here's your squash, softened and ready to be cut into cubes.  


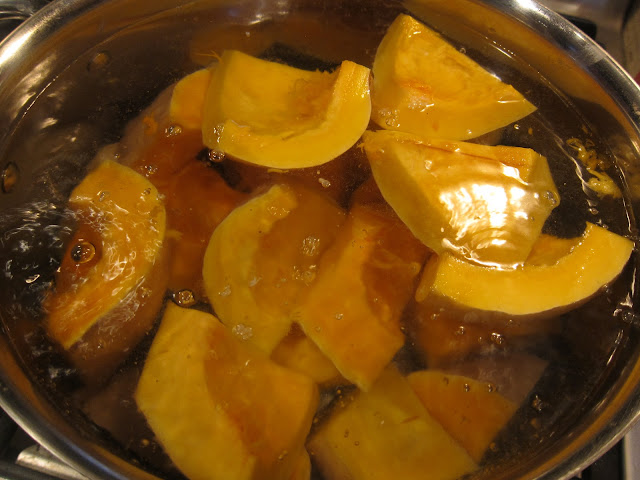
 Boil the squash until tender.


Mix your ingredients.


Scrape out the squash....


....and mash.


Add your other ingredients to the squash.


Pour into a dish and bake.  


While squash is baking, run around like a chicken with your head cut off getting minis showered and into their coordinating outfits.  Mop the bathroom floor, since the middle mini forgot to close the curtain while showering.  Change tiny mini's outfit after she wipes pink toothpaste all over it.  Then, realize boy minis need to be changed too, in order to keep them all coordinating.  Question Mr. McGhee's time management skills (really?  an hour to pack some beer in the cooler?)  Pause to watch Macy's Day parade.  

At this point, your squash should be firm and done baking.  Prepare your topping and add to the squash.  Return to the oven for a few minutes.  I did all of this, I promise.  Somehow I managed to forget to take pictures of the finished squash.  I also have zero pictures of my minis from Thanksgiving day, which is actually a good thing because if I did, then you would realize I was lying about the coordinating outfits.  

Happy eating!

Monday, November 26, 2012

The Upside of Excess

My best friend posted this on Facebook the other day and I wanted to pass this on.  PLEASE take the time to read this.....

The Upside of Excess (from DailyWorth)

We've all heard the advice, especially this time of year: Get enough sleep, don't overdo the cocktails, or the pre-holiday sale spending sprees.

In other words, strive for balance—in your diet, life, and finances. Because then all will be well, right? You'll be happy, solvent, thin and Zen.

Or not. How many busy, creative, passionate women do you know who 

have figured out the perfect equation of work, rest and fun? Who never stay up too late, have one too many glasses of wine, plow through a pint of ice cream in a single sitting, or buy a pair of cute shoes they don't need?

OK, maybe you know one woman like that, but she's probably kind of boring. Or you hate her. What’s crazy is that living a balanced life is supposed to make us all feel less stressed, so we strive for it—then get stressed out when we fail.

Let yourself off the hook about the balance thing. Right now. Sometimes, you've just got to have those shoes. Or ice cream. Or a whole day without the kids. Or you need to spend 14 hours passionately absorbed in a work project.

Or you wake up feeling so aimless that you spend an entire Saturday morning on Facebook instead of going to the gym.

You slip up. You fall down. You live a little too hard, have a little too much fun, get a little too intense sometimes. It’s okay. In fact, the unbalanced life is sometimes just what you need
.


I don't know about you, but I LOVE this and need to read it every day.  Let's face it....striving for balance in life sounds nauseatingly boring to me!  Striving for perfection?  Puh-lease!  Strive for creativity, passion, FUN....strive for authenticity in your life!  Be you because the people in your life that love you, love you for all your non-perfections, non-moderation quirks!

Since this is a post all about celebrating one another, I figured what better food to celebrate over than pot roast!  (OK, that was a very weak segue, but I really wanted to share this recipe!)

  • 1 whole (4 To 5 Pounds) Chuck Roast
  • 2 Tablespoons Olive Oil
  • 2 whole Onions
  • 6 whole Carrots (Up To 8 Carrots)
  • Salt To Taste
  • Pepper To Taste
  • 1 cup Red Wine (optional, You Can Use Beef Broth Instead)
  • 2 cups To 3 Cups Beef Stock
  • 3 sprigs Fresh Thyme, or more to taste
  • 3 sprigs Fresh Rosemary, or more to taste
1.  First and foremost, choose a nicely marbled piece of meat. This will enhance the flavor of your pot roast like nothing else. Generously salt and pepper your chuck roast.
2.  Heat a large pot or Dutch oven over medium-high heat. Then add 2 to 3 tablespoons of olive oil (or you can do a butter/olive oil split).
3.  Cut two onions in half and cut 6 to 8 carrots into 2-inch slices (you can peel them, but you don’t have to). When the oil in the pot is very hot (but not smoking), add in the halved onions, browning them on one side and then the other. Remove the onions to a plate.
4.  Throw the carrots into the same very hot pan and toss them around a bit until slightly browned, about a minute or so.
5.  If needed, add a bit more olive oil to the very hot pan. Place the meat in the pan and sear it for about a minute on all sides until it is nice and brown all over. Remove the roast to a plate.
6.  With the burner still on high, use either red wine or beef broth (about 1 cup) to deglaze the pan, scraping the bottom with a whisk to get all of that wonderful flavor up.
7.  When the bottom of the pan is sufficiently deglazed, place the roast back into the pan and add enough beef stock to cover the meat halfway (about 2 to 3 cups). Add in the onion and the carrots, as well as 3 or 4 sprigs of fresh rosemary and about 3 sprigs of fresh thyme.
8.  Put the lid on, then roast in a 275F oven for 3 hours (for a 3-pound roast). For a 4 to 5-pound roast, plan on 4 hours.
I peeled my carrots with a little help from Lola....


....and my tiny mini.


Brown your onions, enjoy the amazing aroma.


Brown your carrots.


Set aside your onions and carrots.


Sear your roast.  Searing helps to lock the juices into the roast.


 Deglaze your pan.  The recipe says you can use wine or broth.  I always opt for wine when given an option in a recipe.  It's a great excuse to open a bottle that, of course, will need to be finished.


Scrape as much as you can when deglazing.


Put your roast back into the pan.  Add beef broth, onions, carrots, rosemary, and thyme.  Bake at 275 for several hours.


The aroma of this roast is so incredible, you may be tempted to lounge and wait by the oven until it is done.


Monday, November 19, 2012

Taco Challenge

The McGhee family has been road-tripping a lot lately.  Road-tripping to see family.  Road-tripping to see friends.  And even road-tripping for doctor's appointments.  I have to confess, that I am, by far, the worst road-tripper in our family.  Sitting still for any length of time is torture for me, so I welcome any opportunity to pull over and get out of the car.  

So the other day when we were on a car trip and my oldest mini shouts out, "there's Taco Bell, can we pleeeeeease go to Taco Bell?"  All I could think was "Taco Bell?  We're all going to die" but I was so happy to escape the confines of the car, that I agreed.

Something you should know about my oldest mini is that he is very picky and we struggle to get him to eat and keep on weight.  So when he marched up to the counter and ordered three hard shell tacos and an order of nachos, I was shocked.  As he devoured them, pausing only to tell me that was the "best meal he's ever had", I stared in utter disbelief.

And then I realized that my biggest competition in feeding my oldest mini is Toxic Bell.  I decided I would celebrate the fact that my mini had just ingested a 400 calorie lunch (and praying that he could keep it down) rather than curl up in the fetal position in realization that the kid that turns up his nose at nearly everything I cook, has found his true culinary love in Taco Bell.

Once we got home, I decided I would try to win my oldest mini over again with homemade taquitos.

Creamy chicken taquitos
  • 1/3 C (3 oz) cream cheese
  • 1/4 C green salsa
  • 1T fresh lime juice
  • 1/2 t cumin
  • 1 t chili powder
  • 1/2 t onion powder
  • 1/4 t granulated garlic, or garlic powder
  • 3 T chopped cilantro
  • 2 T sliced green onions
  • 2 C shredded cooked chicken (I used the taco chicken meat from our local market)
  • 1 C grated pepperjack cheese
  • small corn tortillas 
  • kosher salt
  • cooking spray

1.  Heat oven to 425. Line a baking sheet with foil and lightly coat with cooking spray.

2.  Heat cream cheese in the microwave for about 20-30 seconds so it’s soft and easy to stir. Add green salsa, lime juice, cumin, chili powder, onion powder and granulated garlic. Stir to combine and then add cilantro and green onions. Add chicken and cheese and combine well.
You can prepare up to this step ahead of time. Just keep the mixture in the fridge. 

3.  Work with a few tortillas at a time and heat in the microwave until they are soft enough to roll without cracking. It helps to place them between damp paper towels. Usually 20-30 seconds will do it. If you find yours are cracking when you roll them or are coming unrolled right away, just try heating them longer and try the paper towel thing.

4.  Place 2-3 T of chicken mixture on the lower third of a tortilla, keeping it about 1/2 inch from the edges.

5.  Then roll it up as tight as you can.

6.  Place seam side down on the baking sheet. Lay all of the taquitos on the baking sheet and make sure they are not touching each other. Spray the tops lightly with cooking spray or an oil mister and sprinkle some kosher salt on top.

7.  Place pan in oven and bake for 15-20 minutes or until crisp and the ends start to get golden brown.

A word of advice....DO NOT forget to sprinkle the kosher salt on top.  I have forgotten before, and there really is a difference in the flavor.  


My cooked chicken.


Filling....chicken, cream cheese, salsa, spices, cilantro, and green onion.


Fill your shells with the filling and cheese.


Roll up your shells.

Place all the filled shells on a baking sheet.  Spray with cooking spray (I used olive oil spray) and sprinkle with kosher salt.


Bake until brown and crispy.


These taquitos are delish.  I totally picture these being the perfect dinner for a household that has teenagers in it.  Make sure you make lots of them though because they go quick!  

I am sad to say that my oldest mini said these were delish, but nowhere near as awesome as Taco Bell.  So, there you go!  I LOSE!!!!

Thursday, November 15, 2012

Muffins!!!

Lately, my oldest boy mini has been mistaken for a girl.  Now, if you know anything about my oldest boy mini, you know that being called a girl is the least of his problems right now.  However, this weekend he was referred to as a lady.  As in a gentlemen opened a door for us, and said, "go ahead, ladies."  Apparently being called a lady is much more offensive than being called a girl when you're a 9 year old boy.  Here is a photo of my boy minis shortly after my oldest mini the "lady incident".


Now, I don't see how he could be mistaken for a lady, but maybe that's because I live with him and I know the noises that come out of that body could not come from any lady.  However, I did come home and make appointments for haircuts.

Yesterday was a chilly day and as we were on our way to get our haircuts, I got this overwhelming desire to do some baking.  So I asked my boy minis what they would like for me to bake for them.  My middle mini shouted, "asparagus!" and my oldest minis shrugged and said, "asparagus does sound good."

Well, they're sort of a buzz-kill on the baking endorphins that were surging through my body.  

I decided to skip their recommendation and make a batch of apple cinnamon muffins.  

Apple Cinnamon Muffins

  • 1 1/4 cups whole wheat flour
  • 1 cup all-purpose flour
  • 3/4 cup light brown sugar
  • 1 teaspoon baking soda
  • 1/2 teaspoon salt
  • 1 teaspoon cinnamon
  • 1/4 teaspoon ground all-spice
  • 1 cup buttermilk
  • 1/4 cup canola oil
  • 1 large egg
  • 1 teaspoon vanilla extract
  • 2 cups diced peeled apples (I use Granny Smith)

For the Topping
  • 1/2 cup light brown sugar
  • 1/3 cup all-purpose flour
  • 1 teaspoon cinnamon
  • 3 tablespoons melted butter

1 1/4 cups whole wheat flour
1 cup all-purpose flour
3/4 cup light brown sugar
1 teaspoon baking soda
1/2 teaspoon salt
1 teaspoon cinnamon
1/4 teaspoon ground all-spice
1 cup buttermilk
1/4 cup canola oil
1 large egg
1 teaspoon vanilla extract
2 cups diced peeled apples (I use Granny Smith)
For the Topping:
1/2 cup light brown sugar
1/3 cup all-purpose flour
1 teaspoon cinnamon
3 tablespoons melted butter

1.  Preheat oven to 375 degrees.  Line a muffin pan with paper liners or spray with cooking spray.  Set aside.

2. In a large bowl, whisk together the whole-wheat flour, all-purpose flour, brown sugar, baking soda, salt, cinnamon, and all-spice. In a small bowl, whisk together buttermilk, oil, egg, and vanilla extract. Pour the wet ingredients over the dry ingredients and mix with a wooden spoon or spatula until just combined. Do not over mix. Add in the apples and stir until just combined.  
3. To make the crumb topping, in a small bowl, combine brown sugar, flour, cinnamon, and melted butter. Mix with a spoon until crumbly.
3. Fill the prepared muffin pan with muffin batter, filling each cup about 3/4 the way full. Sprinkle each muffin with crumb topping. Bake for 20 minutes, or until muffins are golden and a toothpick inserted in the center of a muffin comes out clean. Let muffins cool to room temperature and serve.
Combine your dry ingredients.


Mix together your wet ingredients.


Combine wet and dry ingredients until must moistened.  Do you know that I once took a college course over the chemistry of why overmixing muffins leads to flat muffins?  Fascinating stuff.


This is a new cooking spray I tried.  Smells amazing.  Worked well too.


Make your crumb topping.


Fill the muffin tin with the muffin batter and top with a spoonful of crumb topping.


Bake until toothpick comes out clean.


These muffins were delish!   The minis loved them.  See how happy they are....

In case you were wondering, this photo was taken AFTER the haircuts.  Sorry, dad!

Tuesday, November 13, 2012

Normal?

Is this normal?  Because lately I am starting to think that things don't happen in our house like they do in others.

My middle mini lost a tooth last night.  I am certain that losing a tooth is normal for a 7 year old.  But this is how the whole thing unfolded....

Mr. McGhee and the boy minis were snuggled up in my bed reading a book before bedtime.  My middle mini was laying there, listening, and playing with his loose tooth.  Apparently this book is so hilarious, that at one point, my middle mini laughed so hard, he lost his tooth!

Upon hearing that her brother had lost his tooth, my tiny mini went into full-on panic mode, screaming in terror because the tooth fairy was going to be coming that night.   So, I started consoling her and was doing my best to calm her down, wavering between losing my patience with her and understanding her fears.....because, I agree, the whole fairy coming into your room while you're sleeping thing is sort of freaky.

At this point, the boy minis were laughing hysterically at the flying tooth AND their hysterical sister.  I finally calmed her down and convinced her she is safe because we will leave the tooth on the back deck OUTSIDE of the house with a note on the door that says this......


Normal?

So, now I have this shaggy-looking adorable mini that despite missing 3 front teeth still needs to bed fed.


The first thought I had was grilled cheese and tomato soup.  I shared this tomato soup recipe back in January, but it is definitely worth a re-share.  I got this recipe from Our Best Bites, which I can honestly say I love every recipe from them that I have tried!

Creamy Tomato Soup (makes about 3-4 cups)
  • 1 T reserved oil from sun-dried tomatoes, or olive oil
  • 1 C chopped onion
  • ¾ C shredded carrot
  • 4 cloves garlic, minced
  • 1 tsp sugar
  • 1 tsp kosher salt
  • 1/4 tsp pepper
  • 1 Tbs dried basil
  • 1/2 tsp dried oregano
  • 2/3 C sliced sun-dried tomatoes, packed in oil
  • 2 (14.5 oz) cans diced tomatoes, undrained
  • 14 oz chicken broth
  • 3 oz reduced fat cream cheese
  • optional: 1/2 tsp red pepper flakes

Optional: Parmesan cheese and fresh basil for garnish (not optional in my opinion...but this is the way recipe was written). 

1. Place oil in a large saucepan over medium heat. Add onion, carrot, and garlic, and cook for 3-4 minutes or until vegetables are tender, stirring often.

2. Add sun-dried tomatoes, canned tomatoes, chicken broth, sugar, salt, pepper, oregano and basil.(If you’re adding red pepper flakes, add them now)

3. Bring soup to a boil and then reduce heat to simmer. Cover pan and simmer for 30 minutes.

4. Remove from heat. Place soup in a blender (do this in 2 batches if necessary). Add cream cheese. Remove center piece of blender lid to allow steam to escape, but place a paper towel over opening in blender lid to avoid spills. Process for a few minutes until smooth. You could also add cream cheese directly to the pot and use an immersion blender to combine.
 
5. Add additional salt and pepper to taste and then divide soup among bowls. Garnish each serving with a sprinkle of shredded Parmesan cheese and a fresh basil leaf if desired.

Here's my soup simmering away.  


And here's how you blend it using a blender.  Make sure you take the top off of the lid and cover with a papertowel.  If you don't, the pressure will build up from the steam from the hot soup and pop the lid off while you are blending.  


And here it is all blended.  Delish.

We will eat our tomato soup with grilled cheese.  The minis will probably have plain grilled cheese on Great Harvest honey wheat bread with muenster and cheddar cheese.  Mr. McGhee and I will probably get all fancy and add pesto and avocado to ours.

And hopefully all of our teeth will stay put where they belong for the evening, so we can get back to "normal".

Wednesday, November 7, 2012

Hearty homestyle cooking

Lately I have been on a hearty, homestyle-cooking kick.  Admittedly it isn't my favorite type of food, but Mr. McGhee and the minis love it.  And since we all know that us moms are basically 2nd class citizens in our own homes, I do what I have to do to please them.  

I have noticed to offset all this hearty homestyle eating, I have been having to do a bit more intense cardio workouts.  I recently started doing the stairclimber at the gym, it looks something like this....


I like to pretend it's an escalator at Nordstrom, where they have put the entire store at 99% off.  That'll get me moving.

The most recent meal I had to work off was a cheddar biscuits and a chicken recipe I found on pinterest.  This chicken recipe was claimed to be the "best chicken recipe ever" on pinterest.  In my experience, anything that states it is the "best ______ ever" usually ends up being pretty "meh" to me.  I gave it a go anyway.

Melt in Your Mouth Chicken

  • 4 boneless chicken breast halves
  • 1 cup mayonnaise
  • 1/2 cup freshly grated parmesan cheese
  • 1 1/2 teaspoons seasoning salt
  • 1/2 teaspoon ground black pepper
  • 1 teaspoon garlic powder


1.  Mix mayonnaise, cheese and seasonings.
2.  Spread mixture over chicken breast and place in baking dish.
3.  Bake at 375°F for 45 minutes.


NOTE:  I substituted plain, non-fat greek yogurt for mayo.  I don't buy mayo and I have never had success making my own.  

Mix up your sauce.


Smear it on your chicken.


Bake until chicken is thoroughly cooked. 


Best chicken ever?  Not a chance! Decent chicken recipe that we all ate?  Yep!


I served my chicken with baked sweet potatoes and cheddar biscuits.

Cheddar Biscuits

  • 2 cups all-purpose flour
  • 1 tablespoon baking powder
  • 1/4 teaspoon garlic powder
  • 1/2 teaspoon salt
  • 2 tablespoons shortening
  • 3 tablespoons butter, cold (or room temp works too)
  • 1 cup buttermilk (i never have buttermilk so i use 1 c milk and 1 1/2 tsp vinegar... let them sit together until little bubbles appear on the top, about ten min.)
  • 1 1/4 cups grated sharp cheddar cheese (i pretty much do 2 cups)


Buttery Topping:


  • 3 tablespoons melted butter
  • 1/4 teaspoon dried parsley flakes (not necessary... just pretty)
  • 3/4 teaspoon garlic powder
  • pinch of salt

1.  Preheat oven to 425 degrees. 

2.  In a medium bowl, combine flour, baking powder, garlic powder and salt. 
3.  Cut in shortening and butter until coarse crumbs are formed. 
4.  Lightly mix in grated cheese. Mix in buttermilk just until moist (dry spots here and there are ok - the biscuits will be tough if they are overmixed). 
5.  Drop the biscuits onto a greased or lined baking sheet. Bake for 12-14 minutes, until browned and golden. 
6.  While the biscuits are baking, in a small bowl combine butter, parsley, garlic powder and salt. Right when the biscuits come out of the oven, brush the butter/herb mixture over the biscuits evenly (alternately, you can dip the top of the biscuit into the butter mixture). Serve immediately.

 Mix your dry ingredients.


Add your butter, shortening, and milk.


Drop onto a baking sheet.


Bake until golden brown.  


I really loved these biscuits.  I am, admittedly, a carb-loving, bread-eating sort of girl...so these are pretty much what I spend my days dreaming about.  

Overall, this is a great meal for those chilly nights when the minis are starving after swim practice.  Or soccer practice.  Or volleyball practice.  Or piano lessons.  etc etc etc.....