Thursday, August 30, 2012

Easy Peasy Lemon Squeezy

Do you ever have one of those nights where it's 5:00 and you think, "urgh.  I've got nothing planned for dinner."  If you say you don't, then I don't believe you.  And I don't want to be your friend, you overachiever.

Last night I was dreading dinner.  I opened the fridge and I realized I had two chicken breasts and that's about it.  And then I saw something else that was in my fridge.  A bottle of store-bought premade salad dressing.  (I had bought this salad dressing when we had company over in case they didn't like my homemade.  Turns out, they loved my homemade dressing.  So this sinful (more than 5 ingredients) bottle of salad dressing had been sitting in my fridge ever since then.  Staring at me.  Taunting me with its convenience).

I didn't even think twice about grabbing a ziploc, throwing in the chicken breasts and dumping that dressing all over it.  I let it marinate for about an hour and then Mr. McGhee threw it on the grill.


I had some tortillas that I warmed up on the oven.  I smeared the tortillas with hummus , and filled with strips of the chicken, feta cheese, cucumber sticks, tomato slices, and olives.


We rolled up the tortillas and scarfed these down.  My minis loved them.  Mr. McGhee and two.  And I was happy because they were happy.  I'm that type of girl.

We ate our tortilla roll ups with fruit salad.


The best part about this meal is there was absolutely no clean up.  Well, no clean up for me, at least.  I told Mr. McGhee he could clean up while I went upstairs and put my tiny mini in the tub while I read my book gave my tiny mini a bath.


Tuesday, August 28, 2012

Portobello Mushrooms!

I thought I would share last night's dinner with you.  Last night's dinner was intended to be Sunday's dinner.  But, it rained all day Sunday and Mr. McGhee wasn't in the mood to stand outside in the rain and cook.  So instead, Mr. McGhee and I stayed inside and watched this out the window.


This is our boy minis, outside in the pouring rain, jumping from the top of their swingset and trying to use an umbrella as a parachute.  Sometimes I wonder if my boy minis are really smart.  Or really....errr.....not smart.

Meanwhile, my tiny girl mini was inside doing this.


So, Mr. McGhee and I decided we weren't cooking, and packed up the minis and went out to eat instead.  And that's how Sunday's dinner became Monday's dinner.

We had gone to the farmer's market on Saturday and bought two beautiful portobello mushrooms.  I love the meatiness and earthiness of portobellos, so I was pretty excited to try grilling them.  I decided to try them two different ways, one following a recipe from Bobby Flay's cookbook and one of my own.  

Here's Bobby Flay's recipe for marinated grilled portobello mushrooms.

  • 1/4 cup red wine vinegar
  • 1 tbsp dijon mustard
  • 2 cloves garlic, finely chopped
  • pinch of red chile flakes
  • 1 tbsp finely chopped thyme leaves
  • 2 tbsp finely chopped flat leaf parsley leaf
  • 1/2 cup olive oil
  • kosher salt and ground black pepper
  • 8 portobello mushrooms
  • 1/4 cup canola oil
1.  Heat grill to medium.
2.  Whisk together vinegar, mustard, garlic, red chile flakes, thyme and parsley.  Slowly whisk the olive oil until emulsified.  Season with salt and pepper.  Store in fridge for up to 4 hours.
3.  Brush both sides of mushrooms with canola oil and season with salt and pepper.  Place mushrooms on the grill, cap side down, and grill  until golden brown and slightly charred, 4 to 5 minutes.  Turn the mushrooms over and continue grilling until just cooked through, 3 to 4 minutes longer.
4.  Remove the mushrooms from the grill and cut into 1/2 inch thick slices.  Place the mushrooms in a large bowl, add the marinade, and toss to coat.  Let marinate at room temp for 30 minutes before serving.  Mushrooms can be stored for up to 4 hours in fridge before serving.

Assemble your ingredients for the marinade.


Slowly add your oil.  Fridge for up to 4 hours.  DO NOT put mushrooms in marinade until after they are cooked.


Remove the stem.


Coat with oil and season.


Toss on the grill, cap side down.


Flip and cook the other side.


Slice mushroom.  


Toss mushrooms in marinade and let sit for 30 minutes.


I thought these were very good.  Mr. McGhee didn't love them, he said he preferred my shrooms over Bobby's.  Smart man.

Heids McGhee's pesto portobello  

  • portobello mushroom, stem removed
  • canola oil
  • salt and pepper
  • pesto
  • goat cheese
1.  Brush both sides of mushrooms with canola oil and season with salt and pepper.  Place mushrooms on the grill, cap side down, and grill  until golden brown and slightly charred, 4 to 5 minutes.  
2.  Turn the mushrooms over and smear top of the mushroom with pesto and spinkle with goat cheese.  Grill an additional 4-5 minutes.
3.  I served these with fresh garden tomato slices on the side.

Remove the stem.


Brush both sides with canola oil and season with salt and pepper.


Grill, cap side down for 4-5 minutes.


Flip over and smear pesto and goat cheese slices on top.  Grill an additional 4-5 minutes.


These were delish.  You could eat these alongside a grilled steak or chicken breast, or they could easily stand alone as the main dish.  

Friday, August 24, 2012

After school treat

I told you that my minis went back to school on Wednesday.  I was a tad nervous to pick them up after their first day and hear how things went.  This is the feedback I got......

Oldest Mini:  It felt really good to be back playing football at recess.
Middle Mini:  I love school so much that I didn't want to come home.  The only reason I came home was because I missed Lola.  (I chose not to be hurt over this comment, and celebrate the fact that my boy really loves his puppy.)
Tiny Mini:  I had so much fun with my new friend Chelsea.  (To which, I commented that I didn't know she had a girl named Chelsea in her class.  To which my tiny mini replied, "I don't have a Chelsea in my class.  I forgot her name, so I called her Chelsea in my head.")

Sounds like a successful day to me!

On the 2nd day of school, as I was driving my minis to school I asked my middle mini what he was most looking forward to at school that day.  He replied, "mom, can you be quiet for a second?  I am watching the movie Rio in my head and the best part is coming up."

And that's when I realized my middle mini is weird.  But in a good way.  Quirky, we call it.


 (And, yes, I realize these pictures of my middle mini on the beach have nothing to do with my story, but he's such a doll, I couldn't resist posting them.)

So anyway.....I wanted to have a special treat for my minis to enjoy when they came home from school.  My minis LOVE chocolate milk and I rarely let them have any because the ingredients on the label are a little shocking to me.  So, I found a recipe for homemade chocolate milk and I whipped up a batch for them.  

First you need to make the chocolate syrup.

  • 1/4 cup cocoa 
  • 1/2 cup water
  • 3/4 cup granulated sugar 
  • 1/4 tsp vanilla extract 
1.  Add the water and cocoa to a small saucepan.  Stir and heat over medium heat until the cocoa is dissolved.
2.  Add the sugar and stir until dissolved.
3.  Heat to boiling and stir for 3 minutes while boiling.
4.  Remove from heat and add vanilla extract.
5.  Chill in fridge and add one tablespoon to one cup milk.

Mix your cocoa and water.


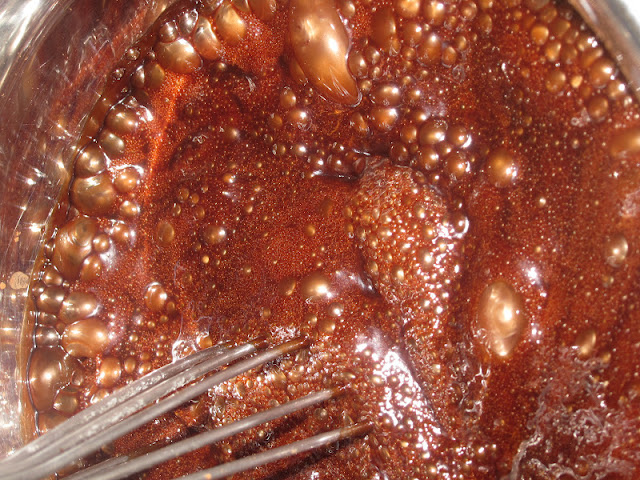
Dissolve cocoa and then add sugar.


Dissolve sugar and then heat to boiling.


Boil and stir for 3 minutes.


Store in a glass jar in the fridge.


Once you've made and cooled your chocolate syrup, add 1 tbsp of chocolate syrup to one cup cold milk.  Stir.  Chug.


This recipe got rave reviews from my minis.  This is probably the most popular unprocessed item that has left my kitchen in 8 months.  They LOVED this chocolate milk.  I mean, look how happy they are.


OK, so maybe we didn't enjoy our chocolate milk ocean-side.  And maybe I am the one playing movies in my head.

Wednesday, August 22, 2012

Back to School

My minis started school today!  Like most moms, I have mixed emotions about this.  My minis, particularly the boys, were getting bored at home and missing their friends.  And I was starting to feel guilty for not doing one single educational activity all summer.  And my "to do once kids are back in school" list was becoming a book.  With chapters.  And, furthermore, I find, that as a family, we are happiest when we are on a routine that is filled with activities to keep all of us busy.  For those reasons, today is a happy day.  


However, am I the only adult that still feels like the beginning of the year starts on the first day of school, rather than on New Years Day?  Because today I definitely have the feeling of "really?  another year gone by so quickly?"  Everyone says it, but wow....I really can't believe how fast it goes and how grown up my minis are.  And then, as a mom, I can't help but question if I've done enough (or too much) over these past years to prepare my minis for the world out there.  Today, my sweet minis raced off for their classrooms, paused, came racing back to give me a quick squeeze, and then happily took off again.  And my heart was filled with joy, because in that moment I felt like my minis were healthy, confident, and secure kids that were ready to take on the world.  

Let's hope I feel that same way at pick-up this afternoon.


And, let's hope this girl makes it through the long, agonizing days without her playmates.


And let's hope I don't turn me into one of those people that schedules regular play dates for her dog.

Last night's dinner was a new recipe I was hoping to put into our rotation of quick and easy dinners.  Unfortunately, my minis have never been huge fans of mac and cheese, and this recipe didn't really change that.  They ate it, but they were much more interested in the green veggies on their plates, and I had to force coax them into eating the mac and cheese.  But, if you have mac and cheese lovers, I recommend you try it out.

Mac and Cheese

  • 2 cups large elbow Macaroni, uncooked (about 1/2 lb)
  • 2 cups low fat Milk (about 16 oz) , or more if needed  **if more milk is needed, additional 1/4 cup milk at a time for final cooking. **
  • 1 tablespoon Butter
  • 1/2 teaspoon Mustard powder
  • 1 teaspoon Salt, plus additional for final season later
  • generous dash of Nutmeg
  • 1 cup Grated Cheese
  • black pepper to taste (optional)


1. Place raw elbow macaroni in colander and quickly rinse under water. Let drain.

2. In medium sauce pan (about 3.5 qt), add milk, raw elbow macaroni, salt, butter, mustard powder and nutmeg.
3. On medium heat, slowly bring milk/macaroni mixture to a simmer, stirring the macaroni frequently as it comes up to a simmer. This will separate macaroni and keep them from sticking together. DO NOT LEAVE THE STOVE! The milk mixture will come to a boil very quickly and leaving it unattended will leave a big mess on your stove stop.
4. Once mixture comes to a simmer, immediately turn down heat to LOW. Macaroni will slowly cook in the milk. Having your heat too high will evaporate the milk too quickly!
5. Continue to stir the mixture frequently so that macaroni will cook evenly and absorb milk evenly.
6. Cook for about 15-20 minutes or until milk has been fully absorbed.
**If macaroni is not cooked fully, add a little more milk or water  to mixture ( in small amounts) until macaroni is fully cooked. This will take about another 5 minutes.
7. When milk has evaporated, stir in grated cheese of your choice. Stir the  cheese evenly into the macaroni.
8. Turn off heat. Place lid on top of pan and cover for about 5 minutes. This rest period will allow macaroni to plump up and absorb any excess milk.
9. Take a final taste and add additional salt to taste. Before serving, stir one final time to mix everything together.
Serve immediately.

This recipe really got my attention because you cook the pasta in the milk.  

The pasta plumps up nicely in the milk.


Super creamy mac and cheese.


I served my mac and cheese with edamame, steamed broccoli, and a glass of green machine.  Not sure why I included so much green in this dinner.  Perhaps I want to be the mom of the kid that announces to the classroom on the first day of school, "Hey!  Guess what?  I just pooped green!"

And, if you want to look up while cooking your dinner and see this......

I recommend this playlist...Want U Back, She's So Mean, and Losing.

Monday, August 20, 2012

Italian Feast

Years ago, when Mr. McGhee and I got married, we went to Florence, Italy for our honeymoon.  That means that Mr. McGhee and I are very fancy people that know things like there are a lot of churches in Italy, men in Italy wear colored jeans, and in Italy, the house wine is cheaper than water.

We also learned that we really really really love bruschetta.  So yesterday, when my oldest mini brought me this, my mind drifted back to the days of my honeymoon and I started fantasizing.  About bruschetta, of course.


Bruschetta is perhaps one of the easiest dishes to make.  The key to making delish bruschetta is to make it ahead of time, so all the flavors can settle and blend together.  I made mine yesterday morning and resisted eating it all day.  I feel like I deserve a reward for that accomplishment.

Bruschetta
  • tomatoes (I used all the tomatoes shown above, except about 10 of the grape tomatoes.  I popped those babies in my mouth as I was whipping this up.)
  • garlic (I only use 3 cloves.  Now, I have been known at times to double, or even triple, the amount of garlic in recipes.  But, in the case, resist that urge.  The tomatoes and basil are the star of this show.)
  • olive oil (several tablespoons)
  • basil (several sprigs of fresh, you can't add too much)
  • salt (to taste)
  • balsamic vinegar
  • parmesan cheese
  • french/italian bread, sliced
1.  In a food processor, add tomatoes, basil, garlic, olive oil and salt.  
2.  Pulse several times until mixture has a thick salsa-like texture.
3.  Place sliced cheese on bread slices and broil in oven until browned.
4.  Drizzle bread with balsamic vinegar and top with heaping amounts of bruschetta.


Pulse several times until you have this.  Let this sit in your fridge for several hours. 


 Top your bread slices with cheese.  You can use Parmesan.  I used a delish homemade cheese I got from the sweet cheese-maker at the farmers market.  


Top with bruschetta and serve.


I served my brushcetta with chicken kabobs with creamy pesto sauce.  This recipe was passed on to me by a friend of my sisters.  My sister always tells me this friend of hers is crazy like me, she loves exercise, gardening, and cooking.  Crazy?  I say she sounds wonderful!

Chicken kabobs with creamy pesto sauce

  • 2 teaspoons grated lemon rind
  • 4 teaspoons fresh lemon juice, divided
  • 2 teaspoons bottled minced garlic
  • 2 teaspoons olive oil 
  • 1/2 teaspoon salt
  • 1/4 teaspoon black pepper
  • (1-inch) pieces yellow bell pepper 
  • cherry tomatoes
  • 1 pound skinless, boneless chicken breasts, cut into 1-inch pieces 
  • small red onion, cut into 8 wedges
  • Cooking spray
  • 2 tablespoons plain low-fat yogurt
  • 2 tablespoons reduced-fat sour cream
  • 1 tablespoon pesto


  1. 1. Preheat broiler.
  2. 2. Combine rind, 1 tablespoon juice, garlic, oil, salt, and pepper. Toss with bell pepper, tomatoes, chicken, and onion. 
  3. 3.  Thread vegetables and chicken onto 4 (12-inch) skewers. Place skewers on a broiler pan coated with cooking spray. Broil 12 minutes or until chicken is done, turning occasionally.
  4. 4. Combine 1 teaspoon juice, yogurt, sour cream, and pesto. Serve sauce with kebabs.

Here's my garden veggies and chicken, tossed with marinade.


We grilled ours on the BBQ, rather than broil them in the oven.


Totally irresistible.  Charred garden veggies.


I increased the amount of pesto in my creamy pesto sauce.  It was delish.  I caught one of my minis licking the bowl.


Delish dinner.  Everyone ate it.  My favorite was the grilled tomatoes dipped in the creamy pesto sauce.  My minis loved the brushcetta and the peppers dipped in pesto sauce.  Mr. McGhee at it all in silence.  That means he likes it.


The best part about this dinner is that it was super easy and fast to make.  Clean-up was simple too.  I pretended like I had laundry to do and snuck up stairs to read my book while Mr. McGhee took care of cleanu-p.  

Monday, August 13, 2012

Bandwagon Flatbreads

Flatbreads are sort of the rage right now.  So this past weekend, I decided to jump on the flatbread bandwagon, and I've got to say....this bandwagon is far more enjoyable than this one.  


Flatbread is super easy to do.  You can make it an appetizer or the meal, itself.  Heck, you could probably get real creative and make it dessert too!


Flatbread


  • 1/2 teaspoon active dry yeast 
  • 1 tablespoon olive oil 
  • 1 1/3 cups flour 
  • 1 teaspoon coarse salt 

1.  Heat grill until hot. 
2.  Place 1/2 cup warm water in a medium size bowl and sprinkle the yeast on top; stir to dissolve, then set aside for 5 minutes until the yeast is foamy. 
3.  Add olive oil, flour and salt and mix to combine. 
4.  Turn the dough onto a well floured surface, knead 2 minutes or until elastic. 
5.  Place dough in an oiled bowl, cover with plastic wrap and let it stand in a warm place for 30 minutes. 
6.  Turn dough onto a lightly floured surface, divide into 4 equal pieces and roll out each piece to 1/8 inch thick round. 
7.  Lightly brush one side of each round with olive oil and place the rounds oiled side down on the hot grill. 
8.  Grill the flatbread for 2 minutes, brush the side that's facing up with olive oil and flip the rounds. 
9.  Grill for 2 more minutes, remove from the grill and sprinkle the hot bread with salt before serving.

Easiest dough ever to make.


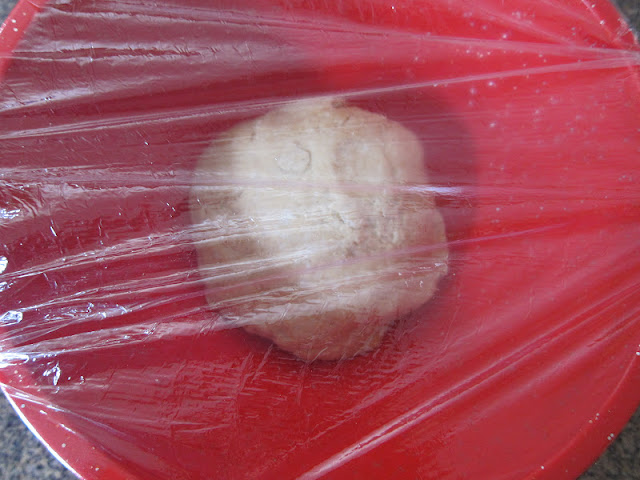
Let dough sit for 30 minutes.


Roll it out.  Don't make it too pretty.  You want it to look homemade.


Toss these babies on the grill after you oil them.  


Flip over and add toppings.  Make your Mr. very nervous by using his grill.


Don't drop shredded cheese on the grill.  Unless you enjoy watching your Mr. sweat.


Let your toppings melt.


Enjoy!


I added my toppings after step 8, so that they were melted and warm as well.  I topped mine with pizza sauce and fresh mozzarella cheese and with pesto, fresh mozzarella, and sliced tomatoes.  They were delish and we will definitely make them again.  Probably when we sit down to cheer for the Reds, Giants, and USC.