Wednesday, January 30, 2013

Juuuuuuuice!!!!

I am so excited to share my big news with you all.  I have started juicing!  Now, if you're someone who goes to the gym often, you may be concerned that I am talking about juicing, and that I am going to end up looking like this.....


No worries, friends.  I am talking about juicing, like this.....


Isn't she lovely?  I put her right next to my Vitamix, so when I'm having a bad day I can talk to them both at the same time.

We've been having a lot of fun with juicing, but the juice I am most proud of is my green juice.  Mr. McGhee and I drank it after we exercised yesterday morning.  At 5 am.  Can I repeat that?  Yesterday, at 5 am, Mr. McGhee and I drank green juice after we exercised.  


I nearly forgot to take a photo, probably because my brain was still a bit foggy.  I mean, it was 5 am.  And, Mr. McGhee and I were up, exercising.  

This particular green juice was a combination of spinach, kale, romaine lettuce, celery, lemon, and ginger.  Holy cow!  What a way to start the day!

One thing I am noticing about juicing is that you need a lot of apples and carrots.  So, the other day I bought 4 bags of organic apples and 4 bags of organic carrots.  The people at the grocery store probably thought I have horses.  And, even though I knew I'd be using those apples and carrots for juicing, I also used them to whip up a batch of one of my absolute favorite salads.


  • 4 apples (I used 1 granny smith and 3 pink lady apples), cut into matchsticks
  • lemon juice
  • 3 cups raw carrots, cut into matchsticks 
  • 1/4 cup chopped chives
  • 1 tbsp olive oil
  • 1 tsp sugar
  • 1/2 tsp salt
  • 1/4 tsp black pepper
  • 2 oz feta cheese, crumbled
1.  Place apples in a large bowl and toss with lemon juice. A
2.  Add carrots, chives, oil, sugar, salt, pepper and cheese; toss to mix thoroughly. 


This salad is delish.  It's crisp and refreshing.  I served mine with shredded BBQ pork on Great Harvest dinner rolls and sweet potatoes, with entirely too much butter.  And I didn't worry about that butter either, since I had exercised very hard that day.  At 5 am.


Another thing I love about this apple salad is that it keeps well over night.  So the next morning, I enjoyed my leftover apple salad over baby spinach leaves.  Delish!

Thursday, January 24, 2013

Free Time!!!

Let me set the scene for you.  It's Wednesday at 10 am.  I realize I have no place I need to be or anything I need to be doing for an hour and a half.  How has this happened?  I have no clue.  I have a sneaking suspicion that I have forgotten that I should be somewhere doing something.  I decide to ignore that thought and enjoy the free time, rather than walking around aimlessly waiting for the school to call me and tell me that one of my minis has ralphed all over.

I crank up the tunes to my favorite Pandora station, flip on the fireplace, and head to the kitchen.  Since it's cloudy with a high of 20 and snowing today, there was really only one thing I could consider cooking.  Soup.  And I knew I had to make this soup recipe that I got from my friend Jami.  My friend Jami lives in Seattle, which means she has very good taste in food and clothing.  So I get very excited whenever I get a new recipe from Jami.  I get equally excited when she messages telling me I should buy things she sees on my pinterest boards.

Roasted Cauliflower and Aged Cheddar Soup

  • 1 small head cauliflower, cut into florets
  • 2 tablespoons oil
  • salt and pepper to taste
  • 1 tablespoon oil
  • 1 medium onion, diced
  • 2 cloves garlic, chopped
  • 1 teaspoon thyme, chopped
  • 3 cups vegetable broth or chicken broth or chicken stock
  • 1 1/2 cups aged white cheddar, shredded
  • 1 cup milk or cream
  • salt and pepper to taste
Directions

  1. Toss the cauliflower florets in the oil along with the salt and pepper and arrange them in a single layer on a large baking sheet.
  2. Roast the cauliflower in a preheated 400F oven until lightly golden brown, about 20-30 minutes.
  3. Heat the oil in a large sauce pan over medium heat, add the onion and saute until tender, about 5-7 minutes.
  4. Add the garlic and thyme and saute until fragrant, about a minute.
  5. Add the broth, deglaze the pan, add the cauliflower, bring to a boil, reduce the heat and simmer, covered, for 20 minutes.
  6. Puree the soup until it reaches your desired consistency with a stick blender.
  7. Mix in the cheese, let it melt without bringing it to boil again.
  8. Mix in the milk, season with salt and pepper and remove from heat.

Chop up your cauliflower, get it oiled, salt and peppered, and roast it at 400.


Remove your roasted cauliflower from the oven.  Resist the urge to eat the entire pan.


Get your onions and garlic sauteed.  Add in your fresh thyme (which by the way, can be a total bit** at times, but don't cheat and used dried.  The fresh is worth the effort).


Add your broth (I used chicken) and your cauliflower.


Get the broth boiling and let it simmer, covered, for 20 minutes.


At this point, you need to puree your soup.  Now, I may sound like I am bragging, but I had a big decision to make....do I use my Vitamix or my Breville food processor?  I went for the Vitamix since my Breville was filled with fresh shredded aged white cheddar. 


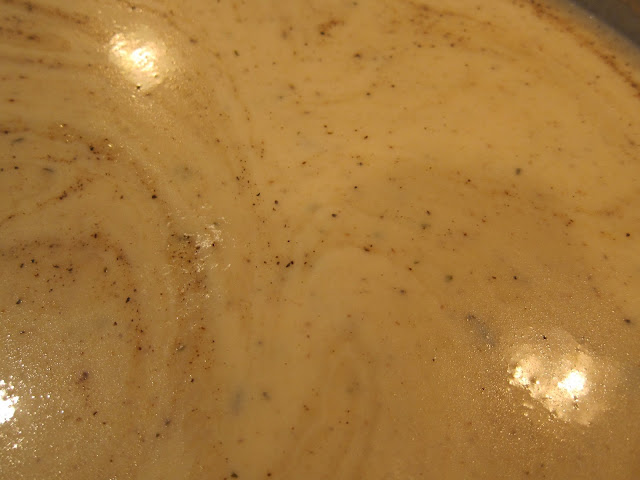
 Get your soup all pureed and then return it to the pan on low heat.


Add your cheese and stir until the cheese is melted.


Pour in your milk/cream.  I suggest adding the milk slowly in small amounts and tasting it between each addition.  I personally prefer the soup with a stronger cauliflower taste, so I use less milk.


Once the milk is added and the soup is warm, it is ready to be served.  


This soup is absolutely delish.  I served it with a loaf of garlic cheddar bread from Great Harvest, which took the dinner from delish to fantastic.  

I actually felt sorry for this girl, who got no soup....but she did enjoy frequent "snow snacks" throughout the day!


Tuesday, January 22, 2013

Family Business

This past weekend we had a little bit of family business that we had to take care of in Florida.  Seeing as the temperature was -4 the morning we left, we were thrilled to head to sunny Florida to take care of our family business.  Here is what the McGhee family business looks like....


 Hey...I didn't say it was tough family business!  

After three days of gorging ourselves on dole whips, candy, and even a kitchen sink (!!!!), we were ready to come home and eat some homemade, nutritious food.  And I knew that this two-bags-of-spinach-recipe was  exactly what we needed.

Spinach-Artichoke Pasta 

  • 6 Tablespoons Butter
  • 4 cloves Garlic, Finely Minced
  • 2 bags Baby Spinach
  • 2 cans Artichoke Hearts, Drained And Halved
  • 3 Tablespoons Flour
  • 3 cups Whole Milk
  • 1/4 teaspoon Cayenne Pepper
  • Salt And Pepper, to taste
  • 1/2 cup Grated Parmesan Cheese
  • 1-1/2 cup Mozzarella Or Monterey Jack Cheese, Grated
  • 1/2 cup Low Sodium Chicken Broth (less Or More)
  • 12 ounces, weight Penne, Cooked Until Al Dente
  • 1/2 cup Seasoned Panko Breadcrumbs
  • Crushed Red Pepper, To Taste

1.  Melt 2 tablespoons butter in a large pot or skillet. Add garlic and throw in the spinach. Stir it around until it's wilted, about 1 minute. Remove spinach from heat and set aside.
2.  Add 2 tablespoons butter to the same pot and raise the heat to high. Throw in the halved artichokes and stir it around until they get a little color, 1 to 2 minutes. Remove the artichokes from the pot and set them aside.
3.  Reduce the heat to low. Add 2 tablespoons butter to the pot. When melted, sprinkle in flour and whisk until it's combined. Pour in milk and whisk to combine. Let it cook for 3 to 4 minutes, or until starting to thicken. Add Parmesan, Mozzarella/Monterey Jack, salt and pepper, and cayenne pepper. Stir to melt, and if it's overly thick, splash in chicken broth.
4.  Add artichokes and pasta, tossing gently to combine. Gently fold in spinach, then pour the pasta into a serving bowl. Sprinkle the top with crushed red pepper flakes and plenty of Panko breadcrumbs for crunch.
Serve immediately!
*side-note:  I realize that this dish also contains over a stick of butter, 2 cups of cheese, and 3 cups of whole milk.  Not exactly low-carb, low-fat, or low-calorie.  You could definitely tweak it by using olive oil, less cheese, and lower-fat milk.*

That's a whole-lotta butter and garlic.  


Spinach before....


...spinach after....

..

Roasted artichokes.  The minis and I stood around the pan and ate them as they were cooking.  Next time I will add three cans.


The butter and flour....beginning of a roux.


Add your milk and whisk, whisk, whisk.


Add your cheese and let it melt.  Add your spices.  I took it easy on the cayenne pepper.


Add the artichoke and pasta back into the cheese sauce.


Fold in the wilted spinach.


Pour into a serving dish and sprinkle with panko crumbs.  In all my excitement to eat this, I forgot the panko crumbs.  Didn't miss them one bit either.


This dish was easy to prepare and it smelled absolutely heavenly.  In fact, my boy minis actually abandoned their legos and came down to investigate what their sniffers were sniffing.  And they were not disapointed....this dish was a huge hit with the minis.  I'm talking man-sized portions.  Mr. McGhee and I agreed, this recipe is a keeper!  I served it with kale chips, which means that the McGhee family consumed 2 bags of spinach and a bag of kale in one dinner.  I think we should be good on the green leafy veggies for a few days.  

Monday, January 14, 2013

Lunch Lady on a Diet

Like everyone else in America, I am currently battling a few "holiday pounds".  Which means, like everyone else in America, I am currently on a diet/cutting back/counting calories.  Which means, like everyone else in America, I am hungry and cranky.

So, if you're in the same boat as I am here is a couple of lunch ideas that I have been rotating lately.  The first is a yummy spinach and fruit salad.


Heids McGhee Winter Fruit Salad

1.  Combine all the ingredients.


This salad is very delish.  Super healthy too!

My other favorite lunch is turkey roll-ups.  My disclaimer is that this is a very processed meal, but it is convenient and would be the perfect lunch to pack to take with you to work.

Turkey Roll-up
  • tortillas
  • cream cheese, I used garlic and herb Laughing Cow (when I make these for the minis, I use hummus
  • turkey slices (I get sliced oven roasted turkey breast from my local deli)
  • pepper slices (I also like to add cucumber)
1.  Slather your cheese or hummus on your tortilla.
2.  Add your turkey and veggies and roll.


I love these.  THey're quick to make and convenient to pack.  They'll make all your coworkers with their lame diet lunches feel like a schmuck.  And that will ease your on a diet/counting calories/cutting back crankiness.